How to Deploy ASP.NET Core to IIS & How ASP.NET Core Hosting Works

How to Configure Your ASP.NET Core App For IIS
The first thing you will notice when creating a new ASP.NET Core project is they are actually console applications. Your project now contains a Program.cs file just like a console app would have and it contains the following code:
public class Program
{
    public static void Main(string[] args)
    {
        var host = new WebHostBuilder()
            .UseKestrel()
            .UseContentRoot(Directory.GetCurrentDirectory())
            .UseIISIntegration()
            .UseStartup()
            .Build();

        host.Run();
    }
}
What is the WebHostBuilder?
All ASP.NET Core applications require a WebHost object that essentially serves as the application and web server. WebHostBuilder is used to configure and create the WebHost. You will normally see UseKestrel() and UseIISIntegration() in the WebHostBuilder setup code.
What do these do?
- UseKestrel() – This registers the IServer interface for Kestrel as the server that will be used to host your application. In the future, there could be other options, including WebListener which will be Windows only.
- UseIISIntegration() – This tells ASP.NET that IIS will be working as a reverse proxy in front of Kestrel. This then specifies some settings around which port Kestrel should listen on, forwarding headers, and other details.
If you are planning to deploy your application to IIS, UseIISIntegration() is required
What is AspNetCoreModule?
You may have noticed that ASP.NET Core projects create a web.config file. This is only used when deploying your application to IIS. It registers the AspNetCoreModule as an HTTP handler.
Default web.config for ASP.NET Core:
<?xml version="1.0" encoding="utf-8"?>
<configuration>
  <system.webServer>
    <handlers>
      <add name="aspNetCore" path="*" verb="*" modules="AspNetCoreModule" resourceType="Unspecified"/>
    </handlers>
    <aspNetCore processPath="%LAUNCHER_PATH%" arguments="%LAUNCHER_ARGS%" stdoutLogEnabled="false" stdoutLogFile=".\logs\stdout" forwardWindowsAuthToken="false"/>
  </system.webServer>
</configuration>
AspNetCoreModule handles all incoming traffic to IIS and acts as the reverse proxy that knows how to hand the traffic off to your ASP.NET Core application. You can view the source code of it on GitHub. It also ensures that your web application is running. It is responsible for starting your process up.
Install .NET Core Windows Server Hosting Bundle
Before you deploy your application, you need to install the .NET Core hosting bundle for IIS. This will install the .NET Core runtime, libraries, and the ASP.NET Core module for IIS.
After installing it, you may need to do a “net stop was /y” and “net start w3svc” to ensure all the changes are picked up for IIS.
Download: .NET Core Windows Server Hosting <- Make sure you pick “Windows Server Hosting!!”
Steps to Deploy ASP.NET Core to IIS
Before you deploy, you need to make sure that WebHostBuilder is configured properly to use Kestrel and IIS. Your web.config should also exist and look similar to our example above.
Step 1: Publish to a File Folder
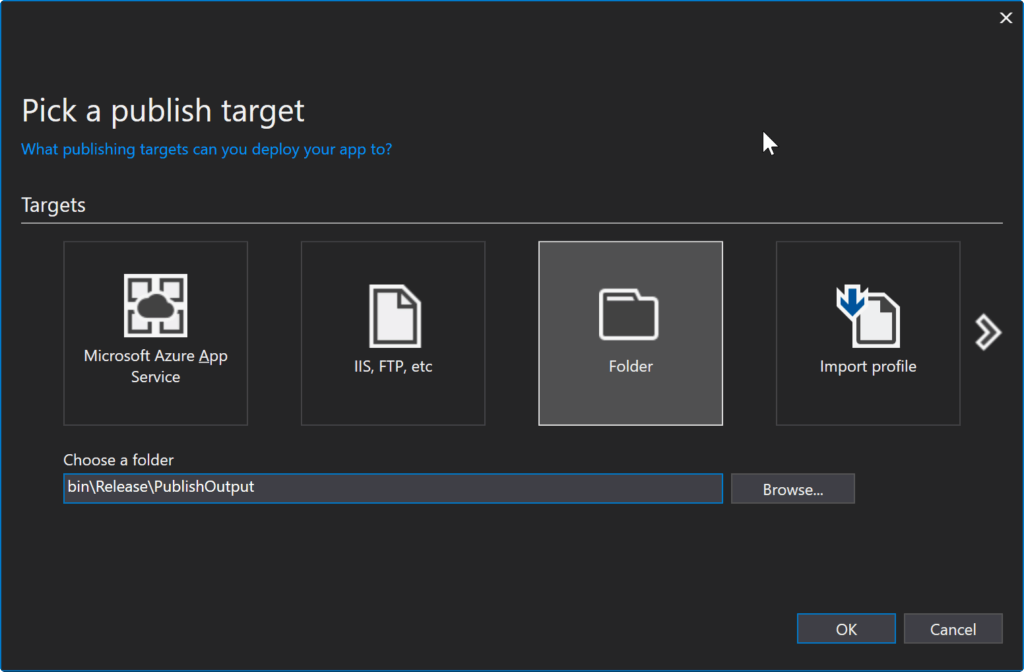
PUBLISH TO FOLDER WITH VISUAL STUDIO 2017
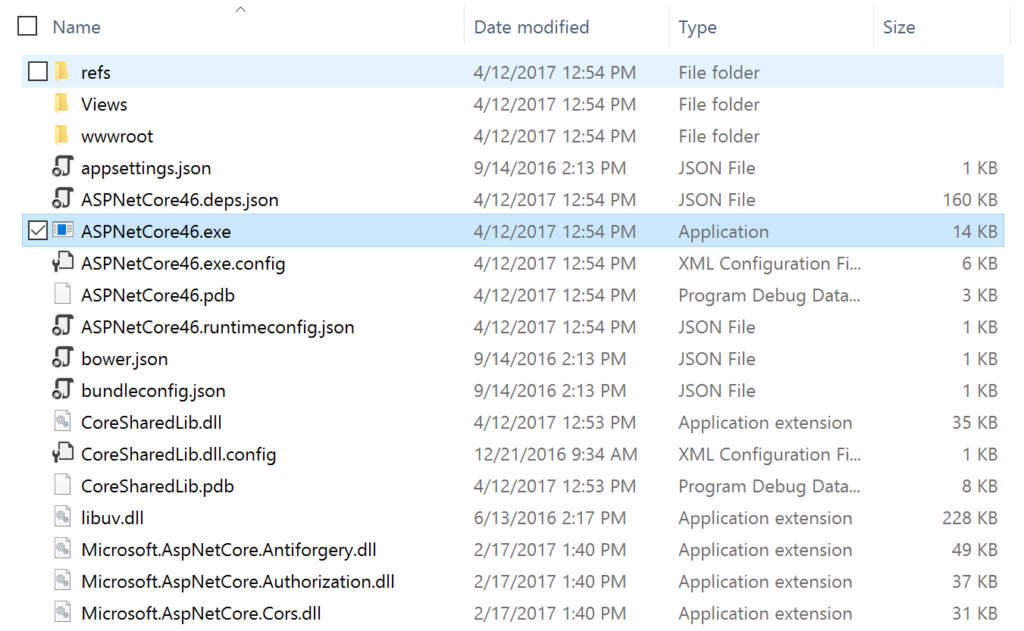
Step 2: Copy Files to Preferred IIS Location
Now you need to copy your publish output to where you want the files to live. If you are deploying to a remote server, you may want to zip up the files and move to the server. If you are deploying to a local dev box, you can copy them locally.
For my example, I am copying the files to C:\inetpub\wwwroot\AspNetCore46
You will notice that with ASP.NET core there is no bin folder and it potentially copies over a ton of different .NET dlls. Your application may also be an EXE file if you are targeting the full .NET Framework. My little sample project had over 100 dlls in the output.
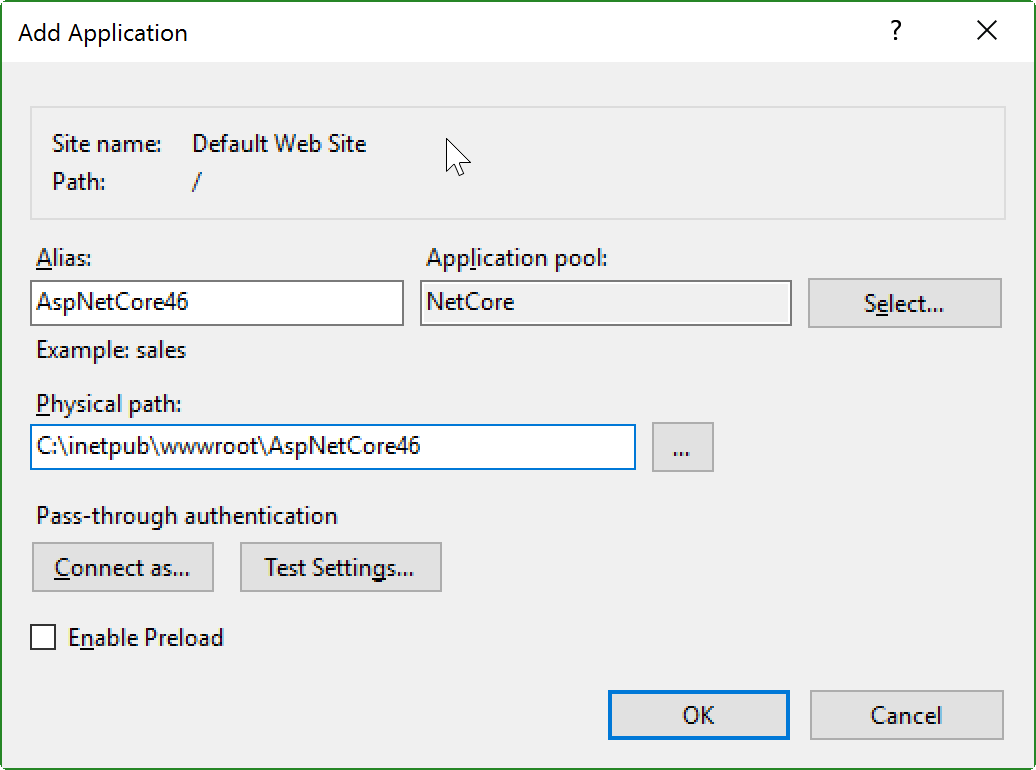
Step 3: Create Application in IIS
First, create a new IIS Application Pool. You will want to create one under the .NET CLR version of “No Managed Code“. Since IIS only works as a reverse proxy, it isn’t actually executing any .NET code.
Second, create your new application under your existing IIS Site, or create a new IIS site. Either way, you will want to pick your new IIS Application Pool and point it at the folder you copied your ASP.NET publish output files to.
Step 4: Load Your App!
At this point, your application should load just fine. If it does not, check the output logging from it. Within your web.config file you define how IIS starts up your ASP.NET Core process. Enable output logging by setting stdoutLogEnabled=true and you may also want to change the log output location as configured in stdoutLogFile. Check out the example web.config before to see where they are set.
Advantages of Using IIS with ASP.NET Core Hosting
Microsoft recommends using IIS with any public facing site for ASP.NET core hosting. IIS provides additional levels of configurability, management, security, logging, and many other things.
One of the big advantages to using IIS is the process management. IIS will automatically start your app and potentially restart it if a crash were to occur. If you were running your ASP.NET Core app as a Windows Service or console app, you would not have that safety net there to start and monitor the process for you.