SQL Server Integration Services (SSIS) Tutorial

SQL Server Integration Services (SSIS) allows you to integrate smoothly with other applications and data sources.
You can use Integration Services to copy or download files, send e-mail messages in response to events, update data warehouses, clean and mine data, and manage SQL Server objects and data.
In SQL Server 2005 and higher, Data Transformation Services (DTS) is no longer installed with SQL Server. All DTS related tasks are now performed with SSIS.
Where Has DTS Gone?
If you have been working with earlier versions of SQL Server (SQL Server 2000 and earlier), you are probably familiar with DTS. DTS allowed you to transfer data between disparate sources into one or more destinations.
Well, starting from SQL Server 2005, DTS has been deprecated. DTS is no longer included with your SQL Server installation.
If you need DTS-type functionality in SQL Server 2008, you will need to use SQL Server Integration Services.
Backwards Compatibility
For backwards compatibility, Microsoft has provided installation files that provide run-time support for DTS packages. This will be useful if you have already created DTS packages in an earlier version of SQL Server.
SQL Server Express & SSIS
SQL Server Integration Services is not available in the Express or Workgroup editions of SQL Server. If you need to use Integration Services, you need at least SQL Server Standard edition. And, if you need to use advanced features (such as data mining, text mining and cleansing or fuzzy transforms), you will need SQL Server Enterprise edition.
Connectivity with MySQL
For data interchange with MySQL there are two options one of which can be accessed in the connection wizards of SQL Server Integration Services assuming you have installed the programs. The other can be used to set up a ODBC DSN as described further down. The two connection options are:
- MySQL Connector/ODBC 5.1
- Connector/Net 5.2 New versions 6.0 & 6.1
In this article we will be using the ODBC connector for MySQL which can be downloaded from the MySQL Site. The connector will be used to create an ODBC DSN.
Transferring a table from SQL Server to MySQL
We will transfer a table in the TestNorthwind database on SQL Server 2008 (Enterprise & Evaluation) to MySQL server database.
Creating an Integration Services project in Visual Studio 2008
Start the Visual Studio 2008 program from its shortcut. Click File | New | Project… to open the New Project window and select an integration services template from the business intelligence projects by providing a suitable name. The project folder will have a file called Package.dtsx which can be renamed with a custom name.
Add and configure an ADO.NET Source
The Project’s package designer will be open displaying the Control Flow tab. Drag and drop a Data Flow Task on to the control flow tabbed page. Click next on the Data Flow tab in the designer to display the Data Flow page. Read the instructions on this page. Drag and drop a ADO.NET Source from the Data Flow Sources items in the Toolbox.
It is assumed that you can set up a connection manager to the resident SQL Server 2008 on your machine. The next figure shows the configured connection manager to the SQL Server 2008. The table (PrincetonTemp) that will be transferred is in the TestNorthwind database. The authentication is Windows and a .NET provider is used to access the data. You may also test the connection by clicking the Test Connection button.
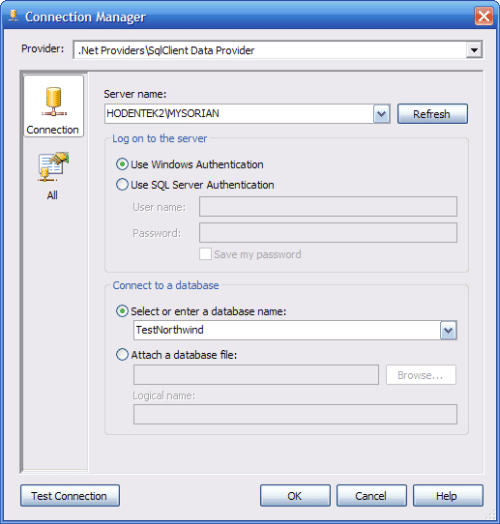
If the connection shown above is correctly configured, the test should indicate a successful connection. Right click the ADO.NET source and from the drop-down click Edit. The ADO.NET Source Editor gets displayed. As mentioned earlier you should be able to access the table and view objects on the database as shown in the next figure.
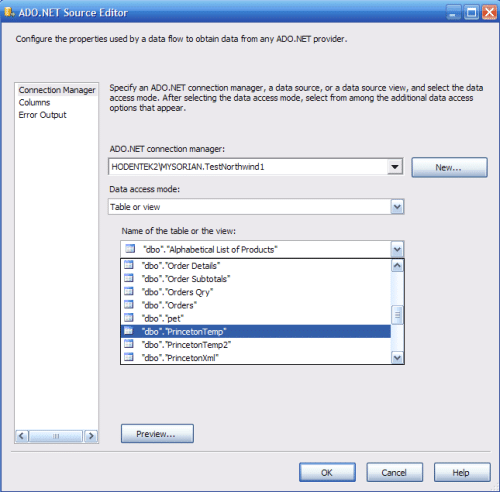
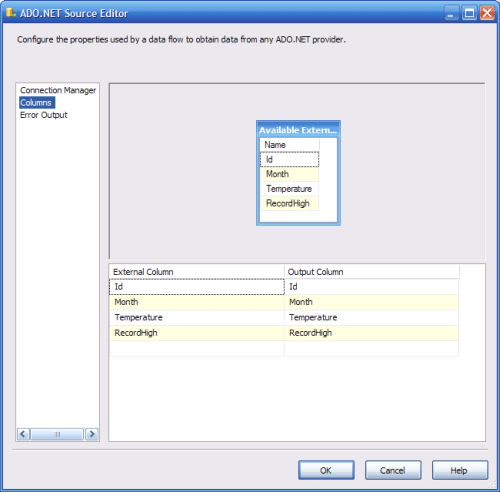
We have chosen to transfer a simple table, PrincetonTemp from the TestNorthwind database on SQL Server 2008. It has a only couple of columns as shown in the Columns page of the ADO.NET Source Editor.
The default for the Error page setting has been assumed, that is, if there is an error or truncation of data the task will fail.
Add an ADO.NET destination and port the data from the source
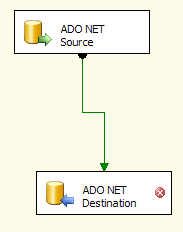
Drag and drop an ADO.NET destination item from under Data Flow Destinations items in the Toolbox on to the data flow page of the designer. There are two ways to arrange for the data to flow from source to the destination. The easy way is just drag the green dangling line from the source with your mouse and let go on the ADO.NET destination. A solid line will connect the source and the destination as shown.
Configure a connection manager to connect to MySQL
In the Connection Manager’s pane under the Package designer right click to display a pop-up menu which allows you to make a new connection. When you agree to make a new ADO.NET Connection the Configure ADO.NET connection Manager’s window shows up and click on New… button on this page.
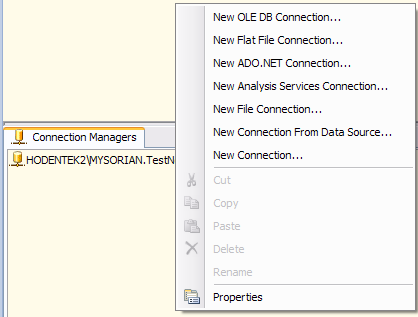
The connection manager’s page gets displayed as shown. In the Providers drop-down you will see a number of providers. There are the two providers that you can use, the ODBC through the connector and the MySQL Data Provider.
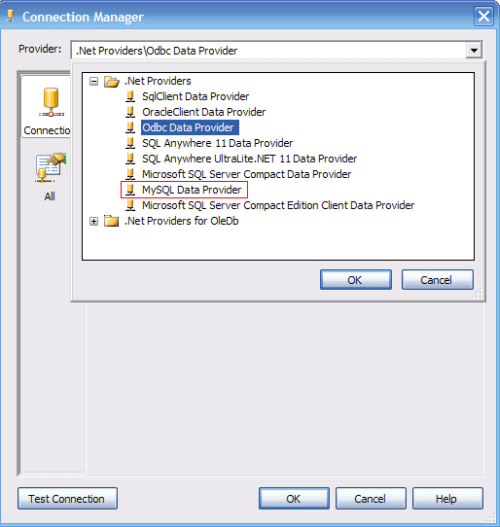
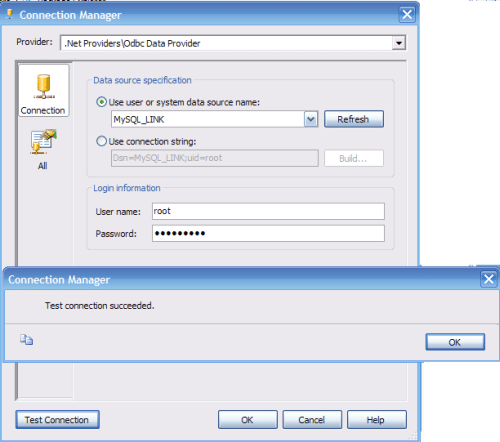
Click on the Odbc Data Provider. As mentioned previously we will be using the System DSN MySQL_Link created earlier for the other article shown in the drop-down list of available ODBC DSN’s.

Provide the USERID and Password; click the Test Connection button. If all the information is correct you should get a success message as shown.
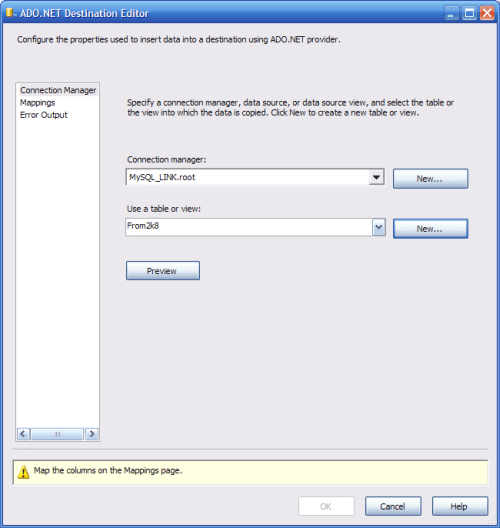
Close out of the message as well as the Configure ADO.NET Connection Manager windows. Right click the ADO.NET Destination to display its editor window. In the drop-down for connection manager you should be able to pick the connection Manager you created in the previous step (MySQL_INK.root) as shown.
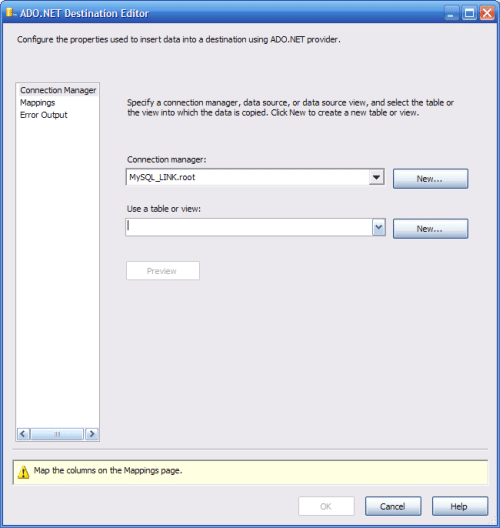
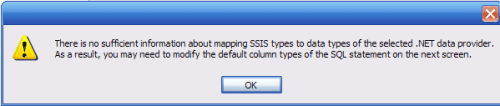
Click on the New… button to create a Table or View. You will get a warning message regarding not knowing the mapping to SSIS as shown.
Click OK. The create table window gets displayed as shown. Notice that the table is displaying all the columns from the table that the source is sending out.
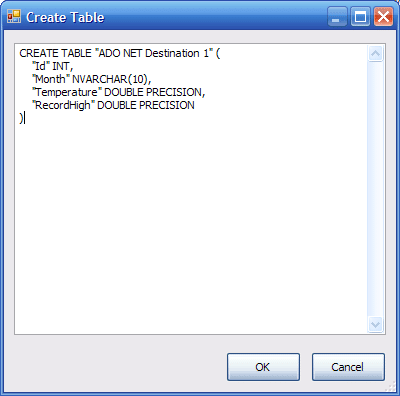
If you were to click OK, you would get an error that the syntax is not correct as shown.
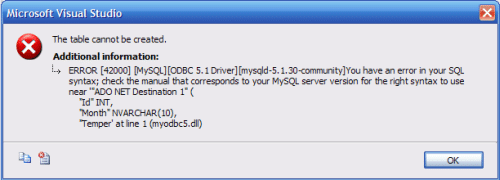
Modify the table as shown to change the destination table name (your choice) and the data type.
CREATE TABLE From2k8(
 "Id" INT,
 "Month" VARCHAR(10),
 "Temperature" DOUBLE PRECISION,
 "RecordHigh" DOUBLE PRECISION
)
Click OK. Again you get the same error regarding syntax not being correct. Modify the Create Table statement further as shown.
CREATE TABLE From2k8 (
 Id INT,
 Month VARCHAR(10),
 Temperature DOUBLE PRECISION,
 RecordHigh DOUBLE PRECISION
)
Click OK after the above modification. The table gets added to the ADO.NET Destination Manager Editor as shown.
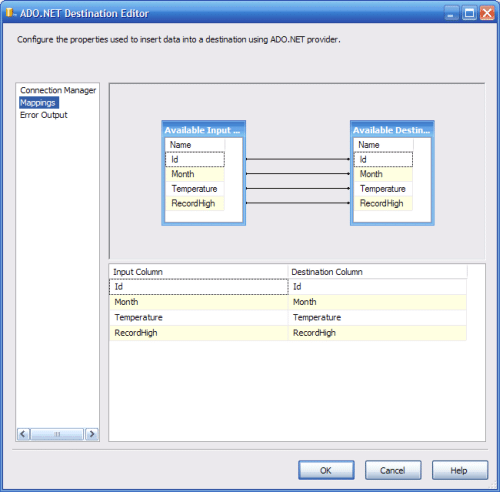
Click on the Mappings on the left side of the ADO.NET Destination Editor. The column mappings page gets displayed as shown. We accept the default settings for Error Output page.
Click OK. Build the project and execute the package by right clicking the package and choosing Execute Package. The program runs and processes the package and ends up being unsuccessful with the error message in the Progress tab of the project as shown (only relevant message is shown here).
....
 .....
 [SSIS.Pipeline] Information: Execute phase is beginning.
 [ADO NET Destination 1 [165]] Error: An exception has occurred during data insertion,
 the message returned from the provider is: ERROR [42000] [MySQL][ODBC 5.1 Driver]
You have an error in your SQL syntax; check the manual that corresponds to your MySQL server version for the right syntax to use near ‘”Id”, “Month”, “Temperature”, “RecordHigh”) VALUES (1, ‘Jan ‘, 4.000000000’ at line 1 [SSIS.Pipeline] Error: SSIS Error Code DTS_E_PROCESSINPUTFAILED. The ProcessInput method on component “ADO NET Destination 1” (165) failed with error code 0xC020844B while processing input “ADO NET Destination Input” (168). The identified component returned an error from the ProcessInput method. The error is specific to the component, but the error is fatal and will cause the Data Flow task to stop running. There may be error messages posted before this with more information about the failure. [SSIS.Pipeline] Information: Post Execute phase is beginning. …… …. Task Data Flow Task failed ….
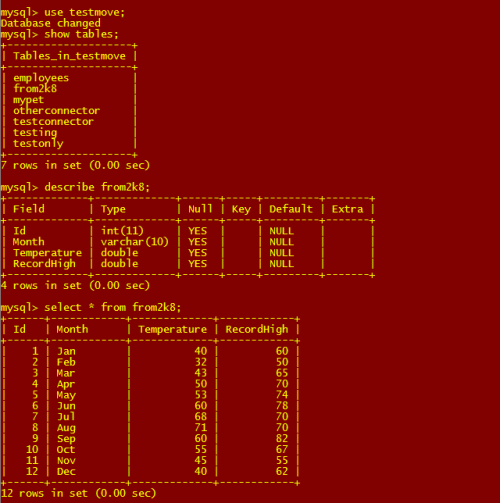
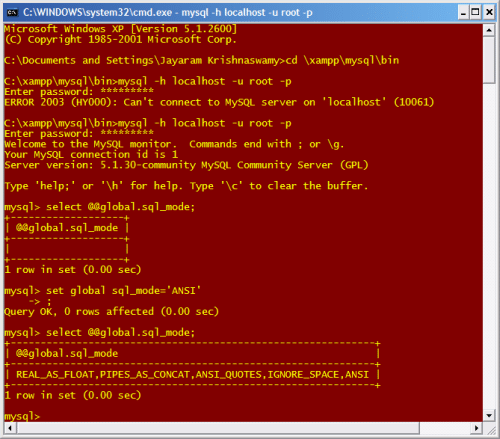
Start the MySQL Server and login to it. Run the following commands as shown in the next figure. By setting the mode to ‘ANSI’ makes the syntax more standard like as MySQL can cater to clients using other SQL modes. This is why the above error is returned although the syntax itself appears correct. In fact a create statement run on command line to create a table directly on MySQL could not create a table and returned an error when SSIS was used to create the same table.
After running the above statements, build the BI project and execute the package. This time the execution is will be successful and you can query the MySQL Server as in the following: