How to Add Google Analytics to WordPress

If you’re trying to gather data about your users, here are different ways you can connect Google Analytics to your WordPress site.
In each case, we’ll assume you already have a Google Analytics account set up. If you don’t, head over and create one first, then come back for your next steps.
1. Add Google Analytics to WordPress with a Plugin
The simplest way for most WordPress users to add Google Analytics to their sites is with a plugin. This method saves you from having to edit your website’s code.
To do this, we recommend two plugins:
Site Kit by Google
If you’d like to add Google Analytics to your WordPress site, Google has got you covered with a simple yet powerful plugin: Site Kit by Google.
This free plugin connects Google Analytics to your WordPress site in just a few clicks but that’s not all. On top of analytics, this plugin pulls data from other services provided by Google, like Google Search Console, Google AdSense, and PageSpeed Insights allowing you to build a nice dashboard based on Google as your data source.
Here’s how to get started:
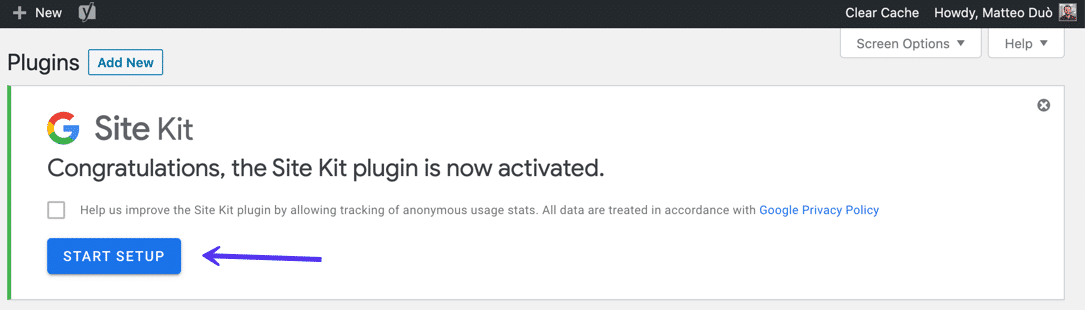
Install and activate the Site Kit by Google plugin, then click on the Start Setup button.
When done, you’ll be required to connect your WordPress site to your Analytics account.
As you might expect, you’ll need to go through a few steps to verify you’re the owner of the domain, grant access to Google to its data, and set up each service you’d like to add to WordPress.

When successfully connected with your Google account, you’ll be then able to see data from Google Analytics along with all other services activated directly in your WordPress dashboard. Here’s how it looks:
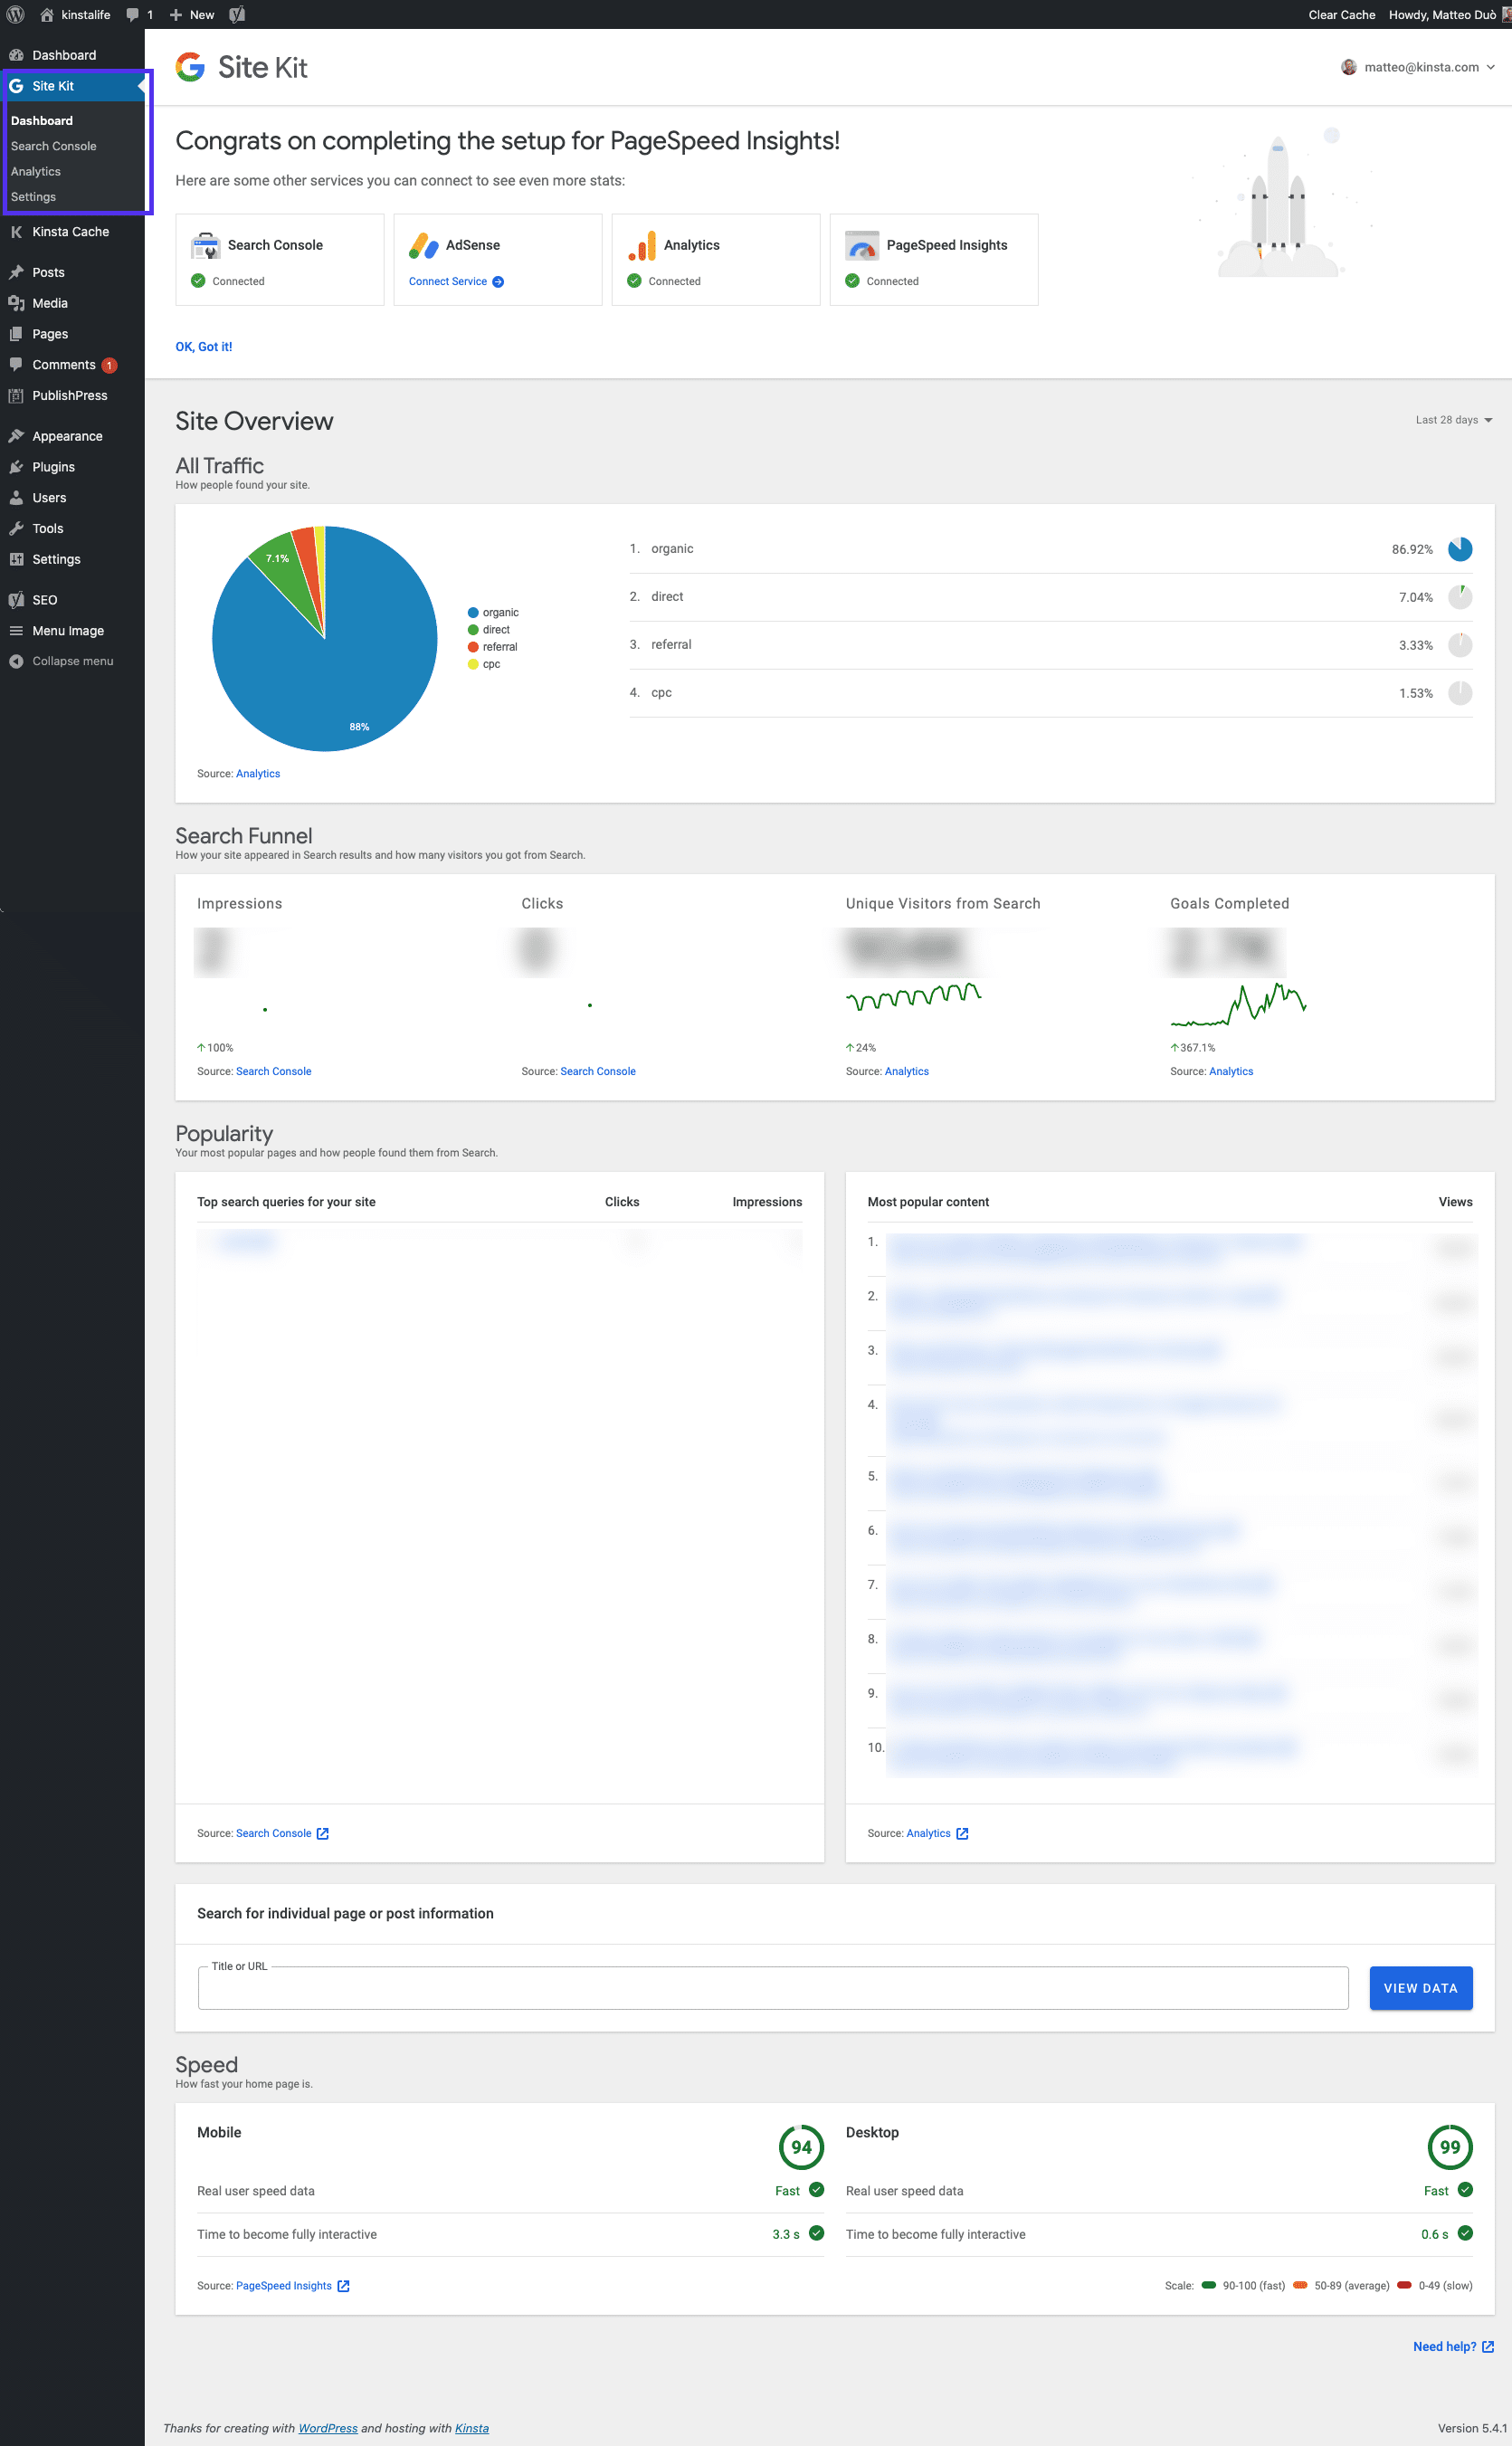
All this data will always be reachable directly within WordPress in your left-hand sidebar.
If this plugin is too much for you and want to keep things focus primarily on Google Analytics, you could use the next plugin.
GA Google Analytics
The free GA Google Analytics plugin by Jeff Starr has over 400,000 active installs and a five-star rating:

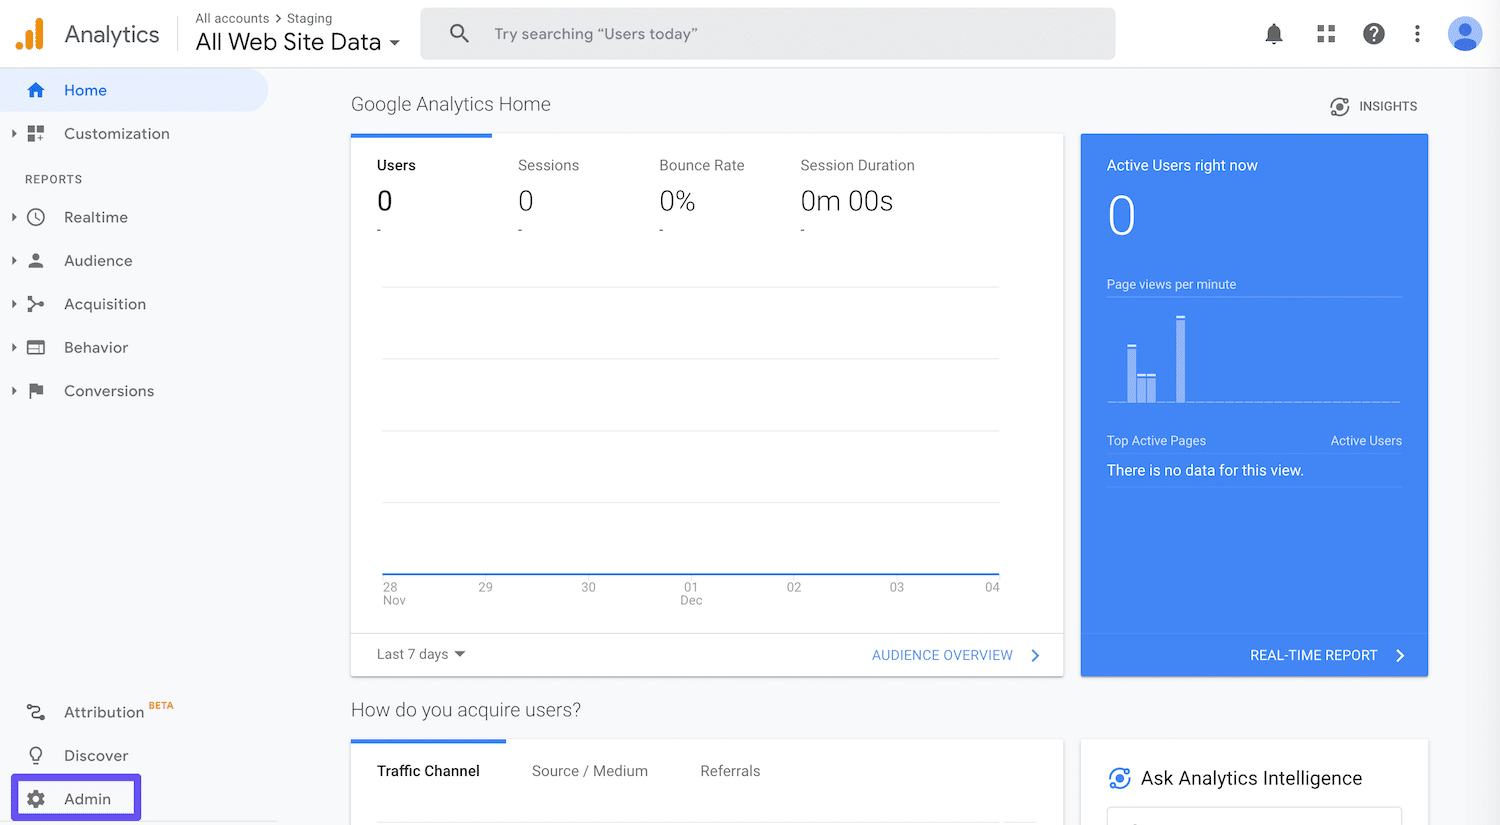
After you install and activate the plugin, all you have to do is add your Google Analytics tracking ID in its settings. To retrieve your tracking ID, go to your Google Analytics account and click on Admin in the sidebar:
Under Property, select Tracking Info, then click on Tracking Code:
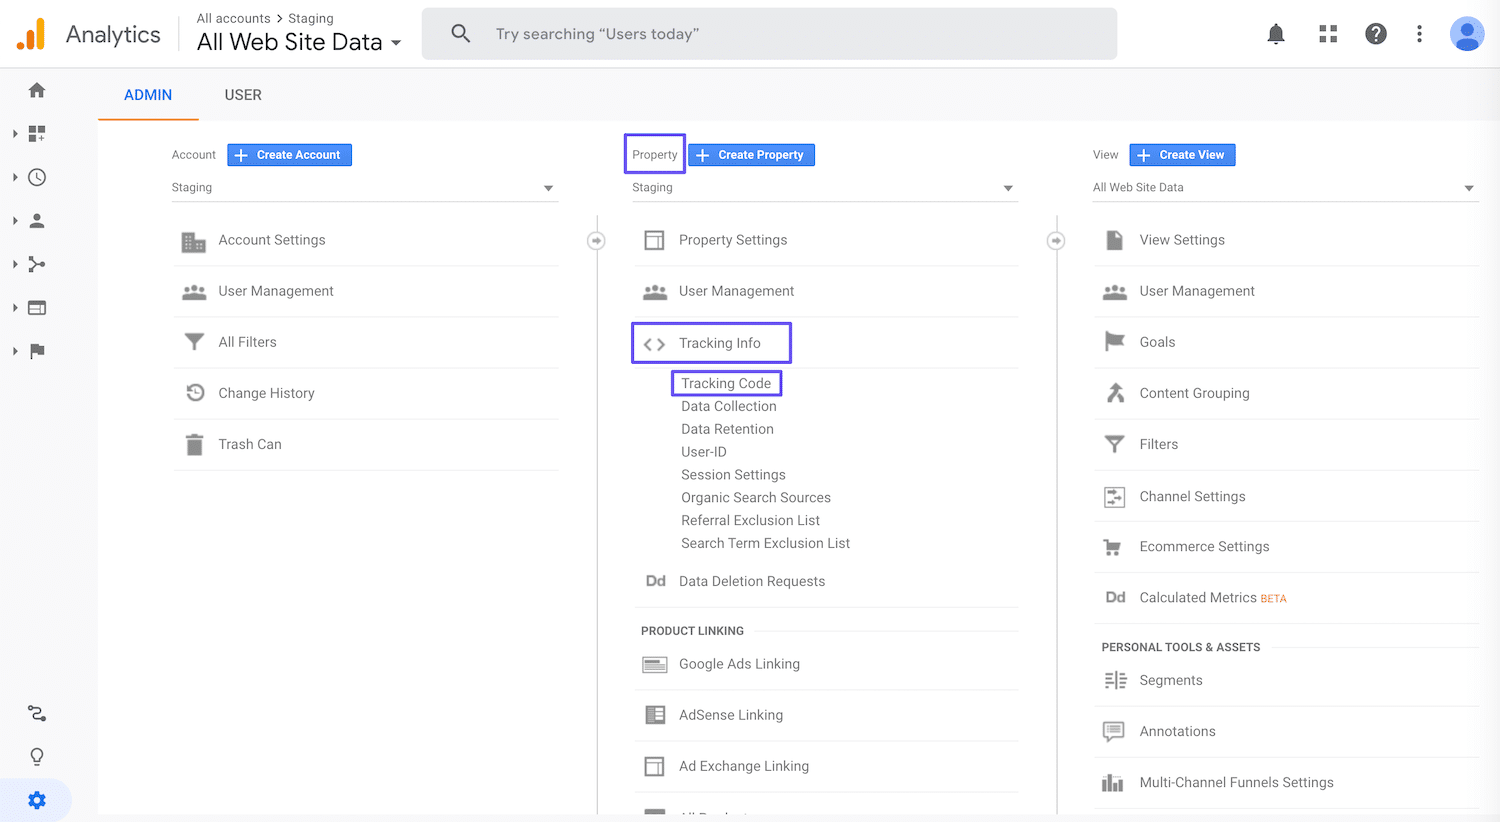
Your tracking ID will start with UA and be at the top of this section:
In your WordPress dashboard, navigate to Settings > Google Analytics. Scroll down to Plugin Settings and add your tracking code in the relevant field:
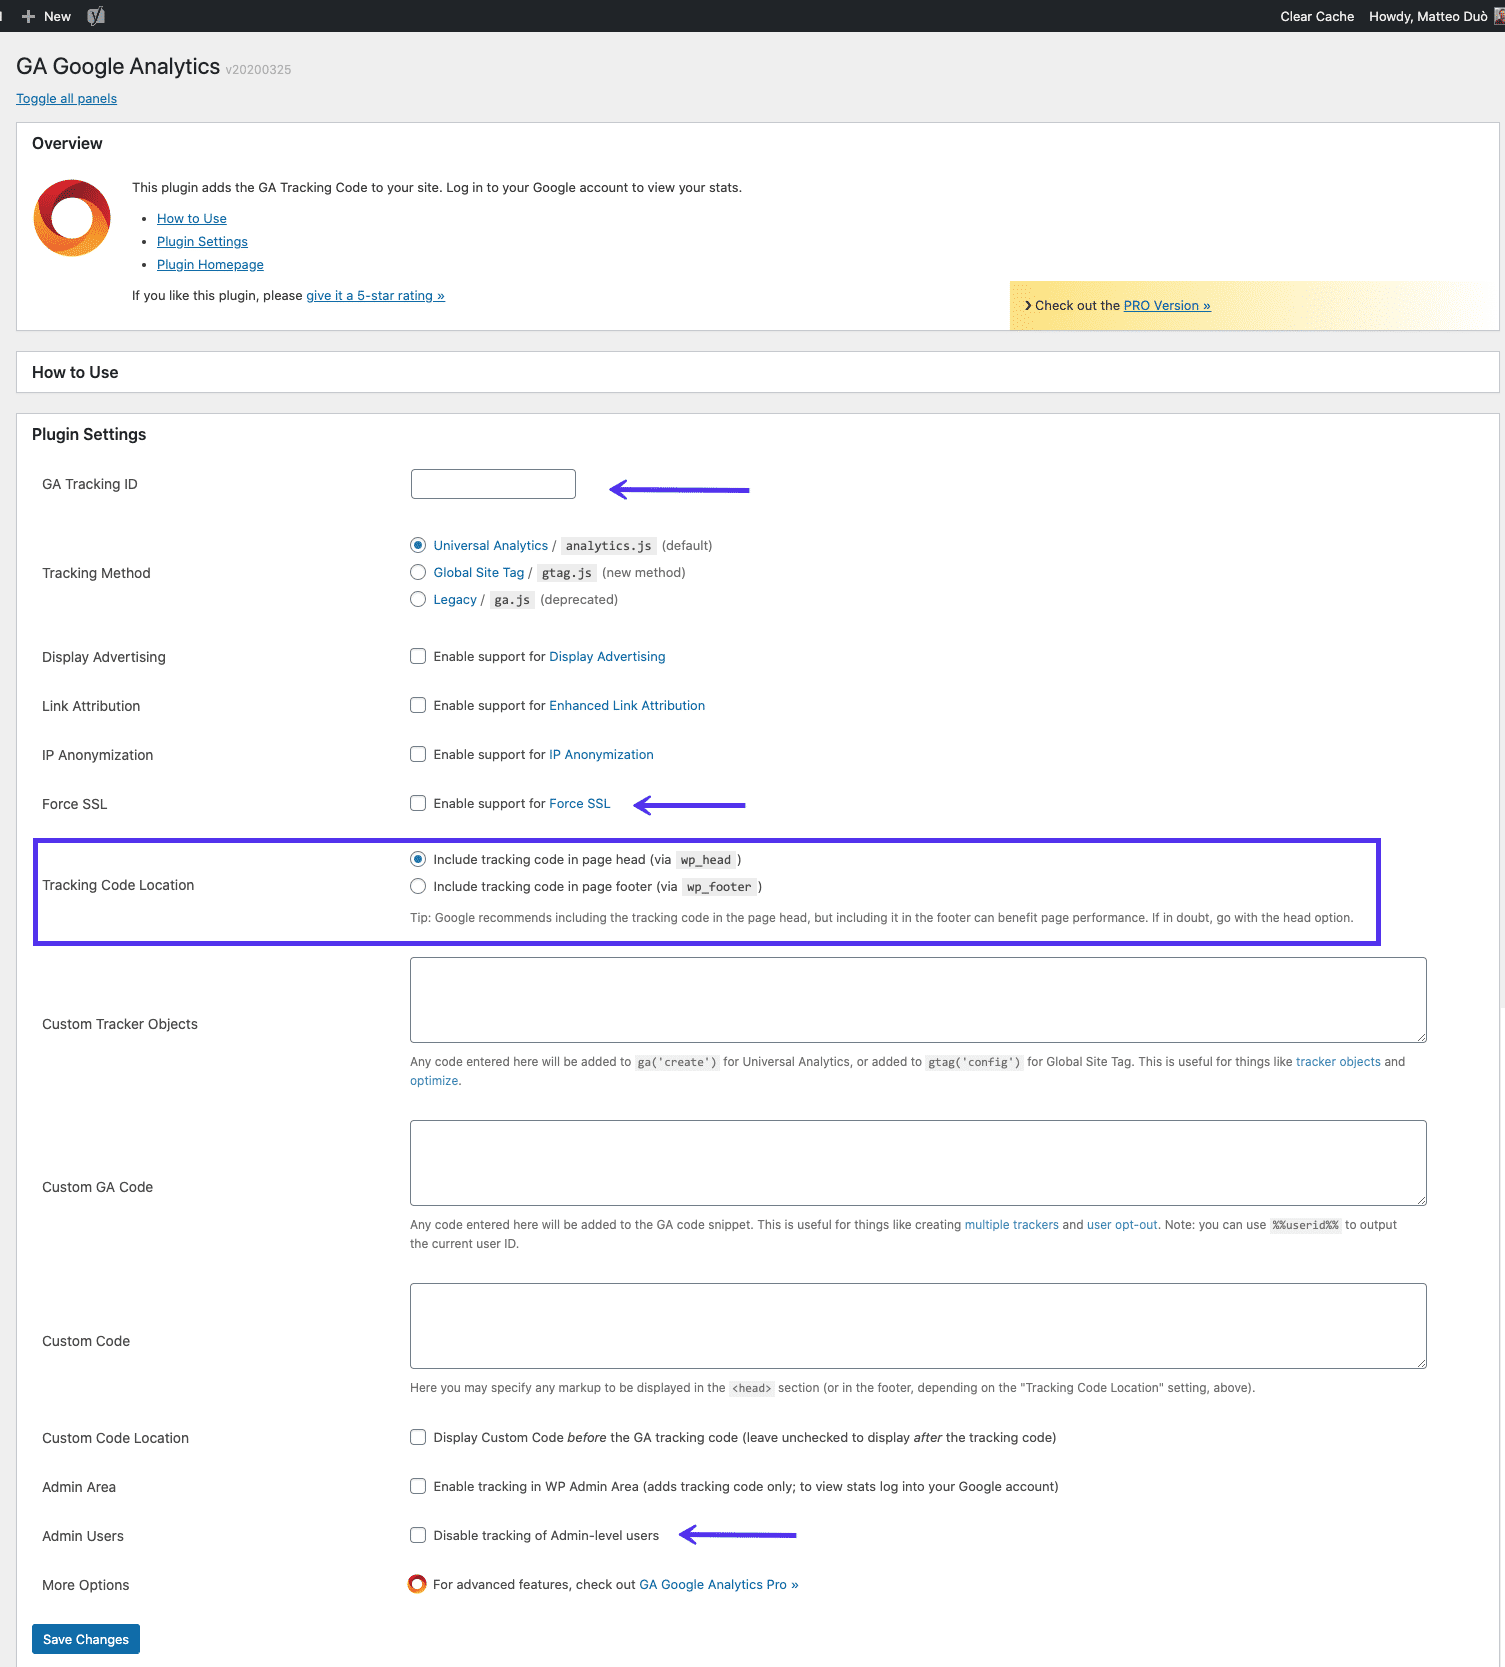
This plugin allows you to also choose whether you’d like the tracking code to be placed in your header vs footer, add custom tracking code, force SSL, disable tracking for your admin users, and a few other useful options.
Once tweaked to your needs, scroll down and click on the Save Changes button. Google Analytics should now be active on your WordPress site.
2. Manually Connect Google Analytics and WordPress with Code
If you’d prefer not to use a plugin, it’s also fairly simple to add the Google Analytics tracking code directly to your WordPress theme via your functions.php file.
If you go the manual route, it’s essential that you use a child theme so that your tracking code won’t be overwritten every time you update your WordPress theme. Before you make any changes, though, it’s always good practice to make a backup.
Once your child theme is active, you’ll need to paste your Google Analytics Tracking Code right before the closing </head> tag in your header.php file.
To find your Google Analytics tracking code, go to your account and access your tracking info as we described in the previous method. You can then copy the script from the box under Google Site Tag:
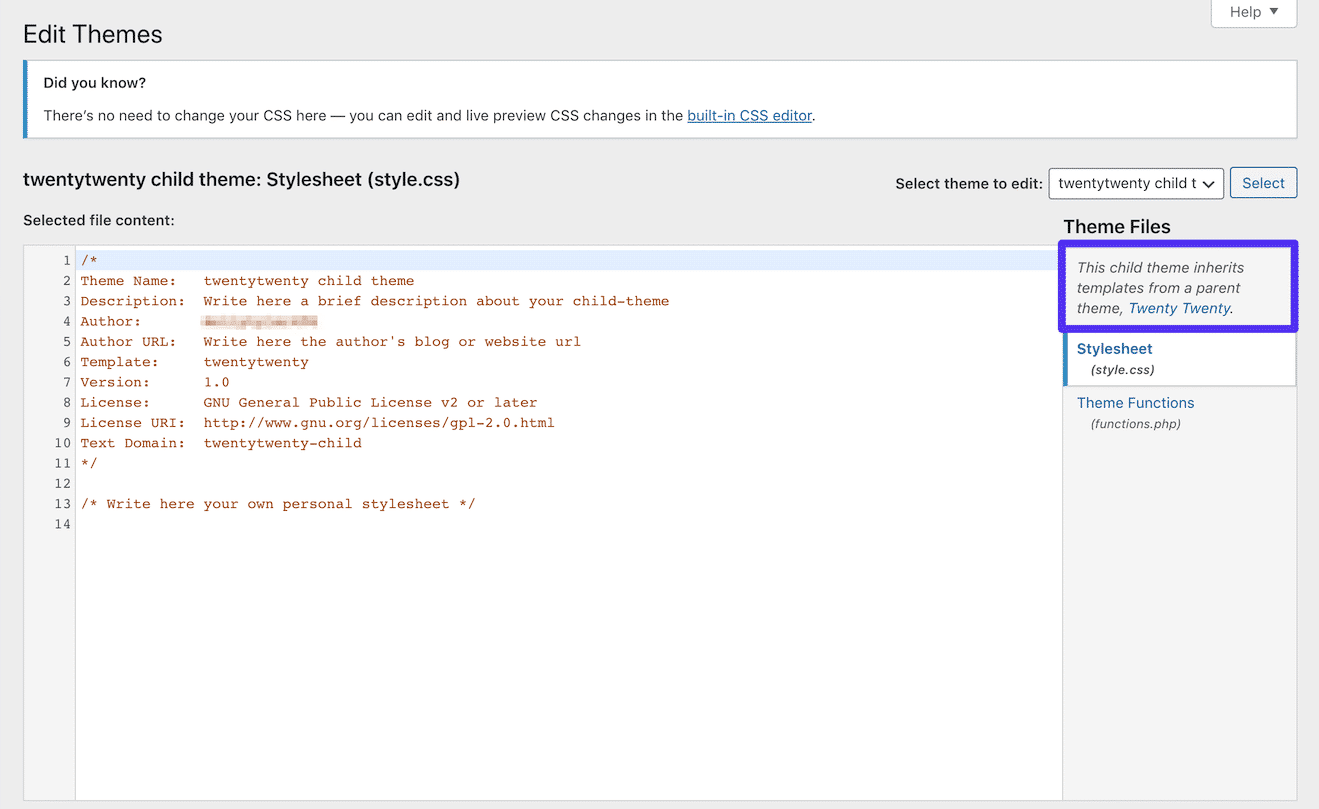
To add it to your WordPress site, go to Appearance > Theme Editor. If your child theme is inheriting template files from its parent, you won’t see header.php here. You can click on the name of your parent theme in the file list to access it:
Once you’ve located and selected header.php, paste the Google Analytics Tracking Code right before the </head> tag in the Editor:
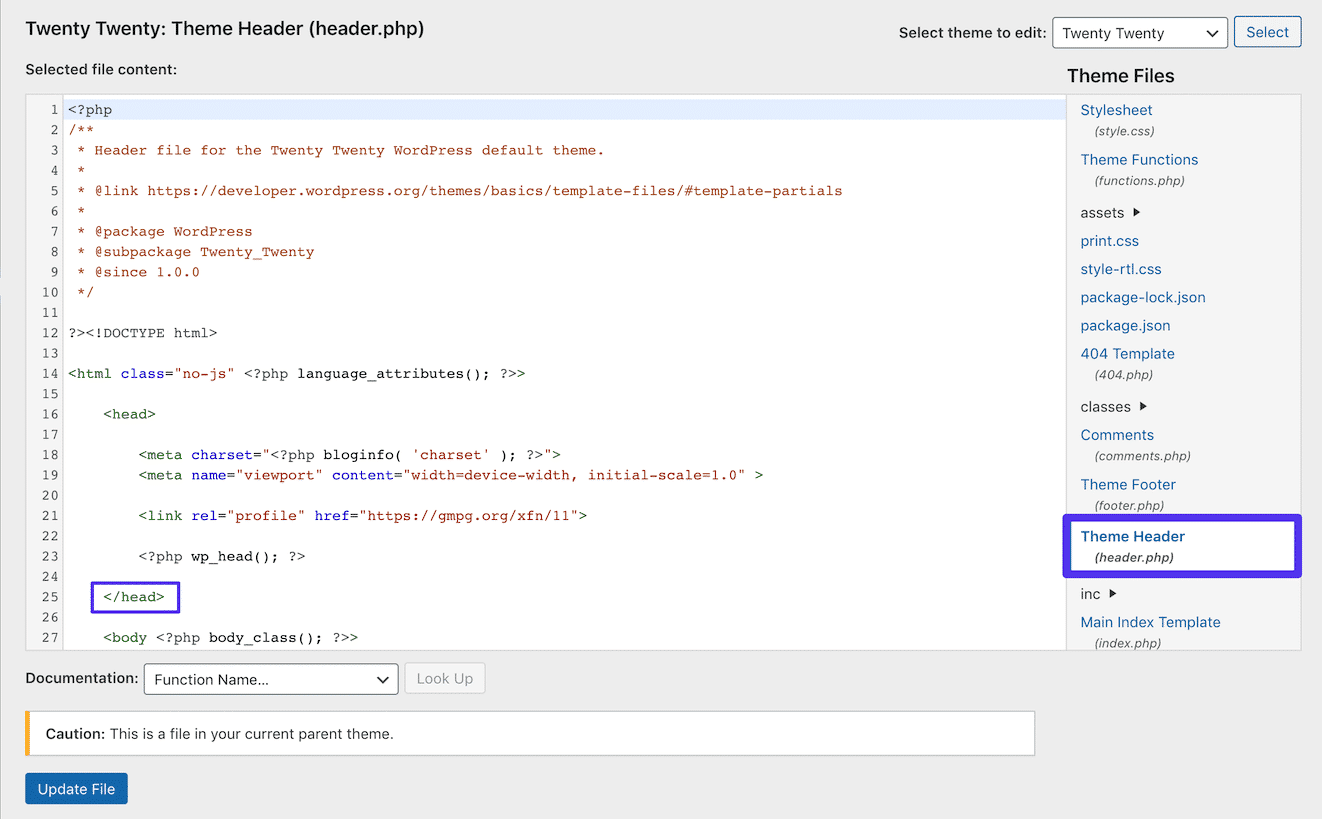
Then, make sure to click on the Update File button. Google Analytics tracking code is now being added to WordPress.
3. Integrate Google Analytics and WordPress with Google Tag Manager
Another method you can use to add Google Analytics to WordPress is using Google Tag Manager. This is really meant for sites that incorporate scripts for a variety of purposes, not solely analytics.
Google Tag Manager is a tag management system. It allows you to quickly and easily update tags and code snippets on your website or mobile app, such as those intended for traffic analysis and marketing optimization.
You can add and update scripts from the Tag Manager user interface, instead of editing site code in WordPress. This reduces errors and frees you from having to involve a developer when configuring tags.
The easiest way to do this is to use the free Google Tag Manager WordPress plugin. It currently has over 300,000 active installs and a five-star rating:

You can download the Google Tag Manager plugin from the WordPress repository or by searching for it under Plugins > Add New in your WordPress dashboard. You will then need to sign up for a Google Tag Manager account and create your first container.
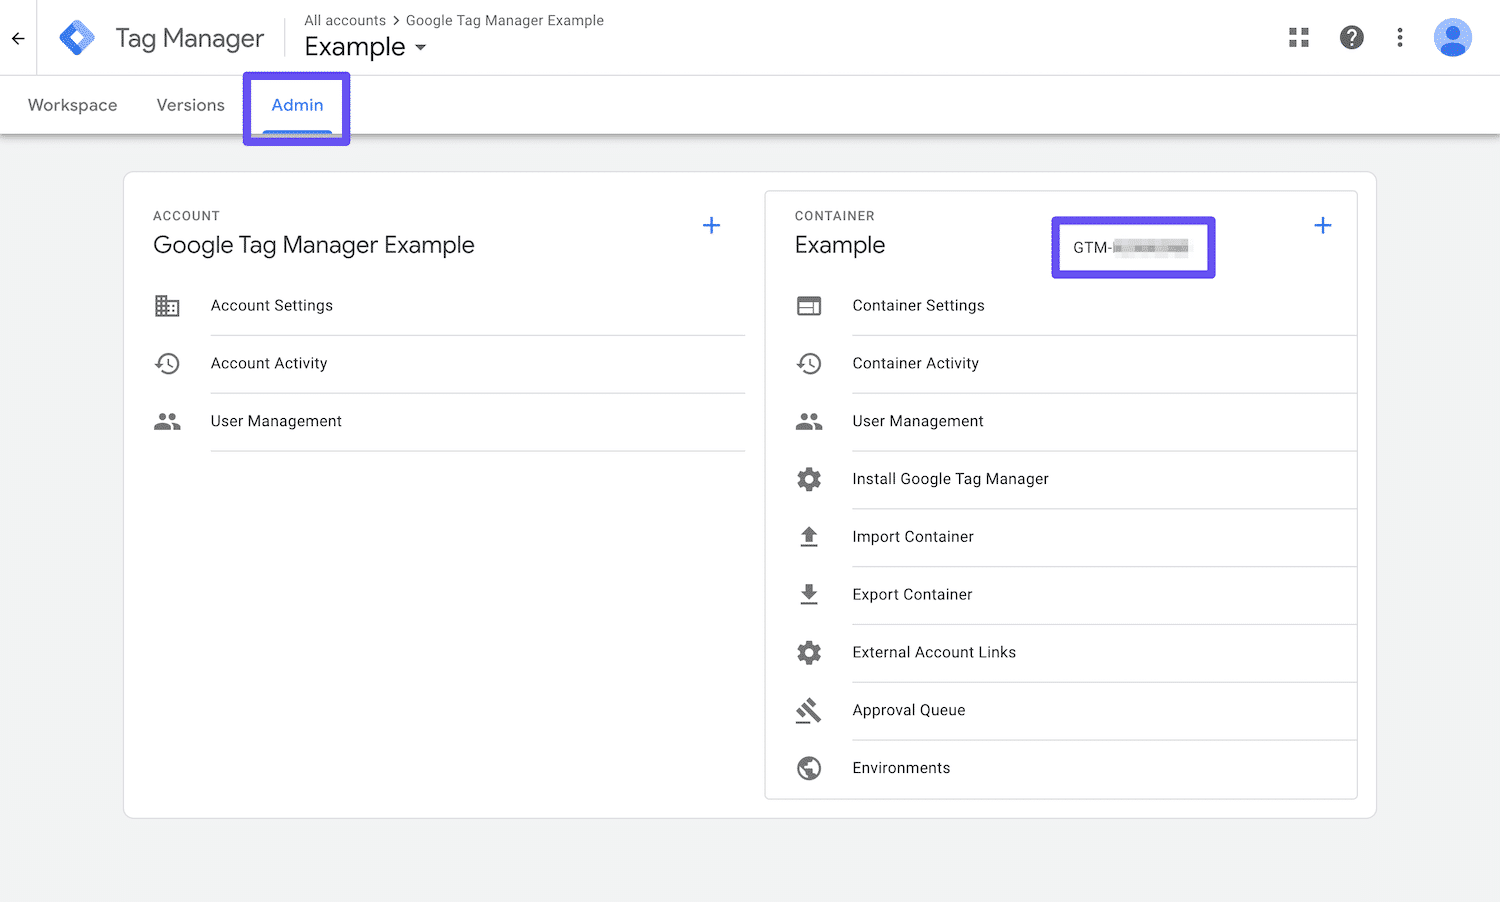
Once you have completed the above steps, you can copy your container ID from the Google Tag Manager dashboard by navigating to the Admin tab and looking for a series of characters starting with GTM:
Then return to your WordPress site and paste your Google Tag Manager ID into the relevant field on the plugin’s settings page. You can get there by navigating to Settings > Google Tag Manager:
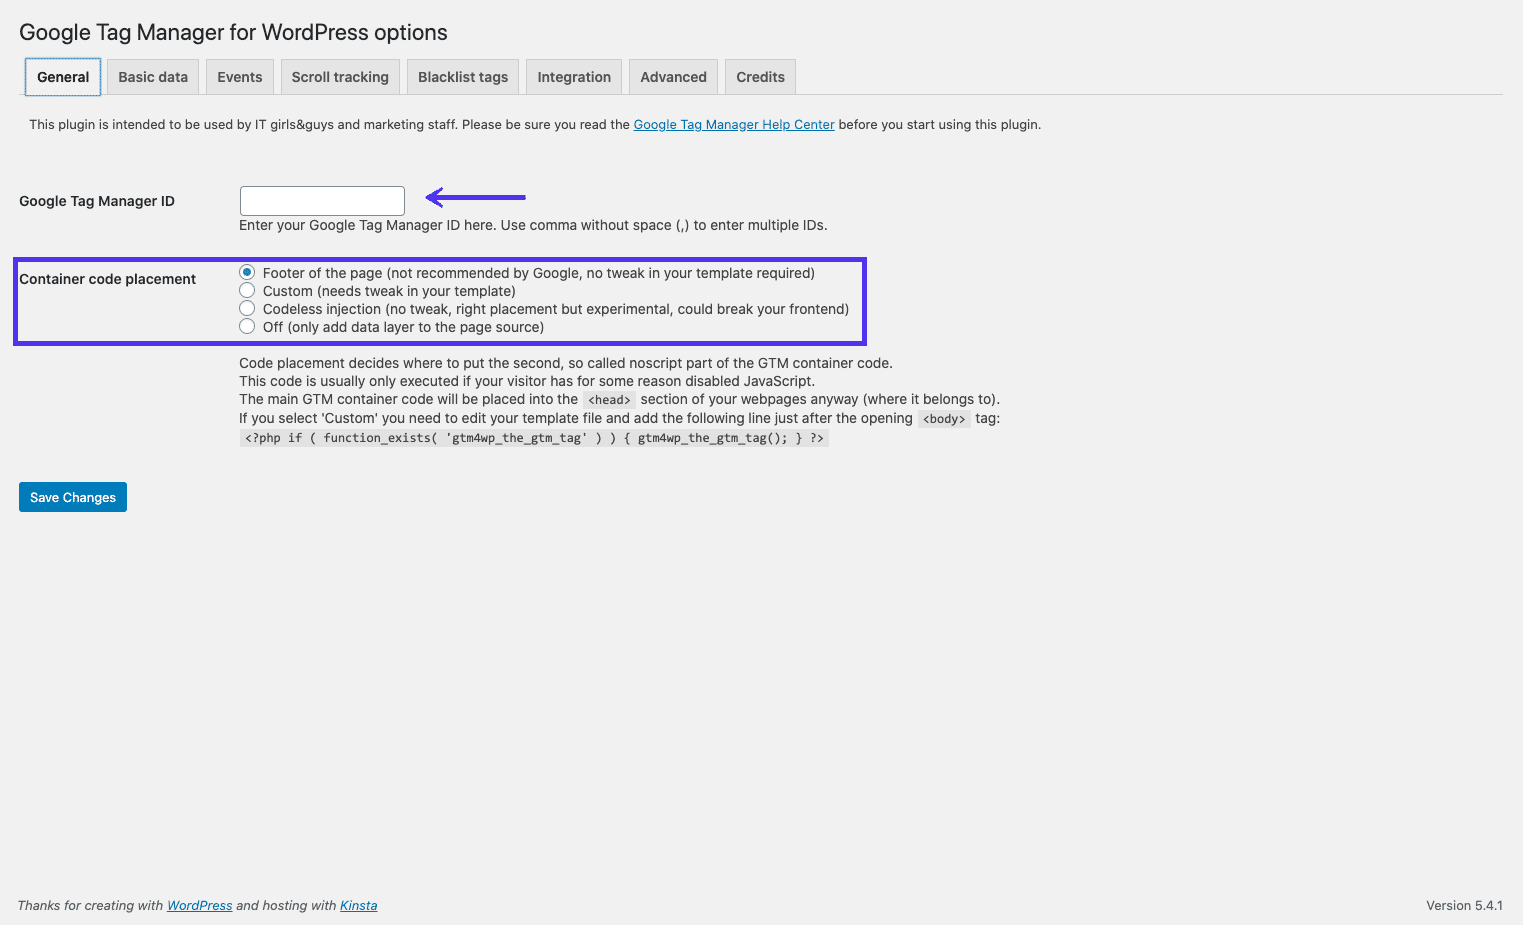
Any tag you set up in Google Tag Manager (including the one for Google Analytics) will now work on your WordPress site via the plugin.
4. Sync Google Analytics Locally for Performance Reasons
The final method you can use is to sync the Google Analytics script locally on your own server. Please be aware that this method isn’t supported by Google.
However, there are a couple of reasons you might want to do this. First, syncing Google Analytics locally can reduce your external HTTP requests. Additionally, you’ll have full control over the caching of the file so you can use your own server’s cache headers.
This is important for improving website performance. If you use Google PageSpeed Insights, you may have seen a “Serve static assets with an efficient cache policy” warning for your Google Analytics script:
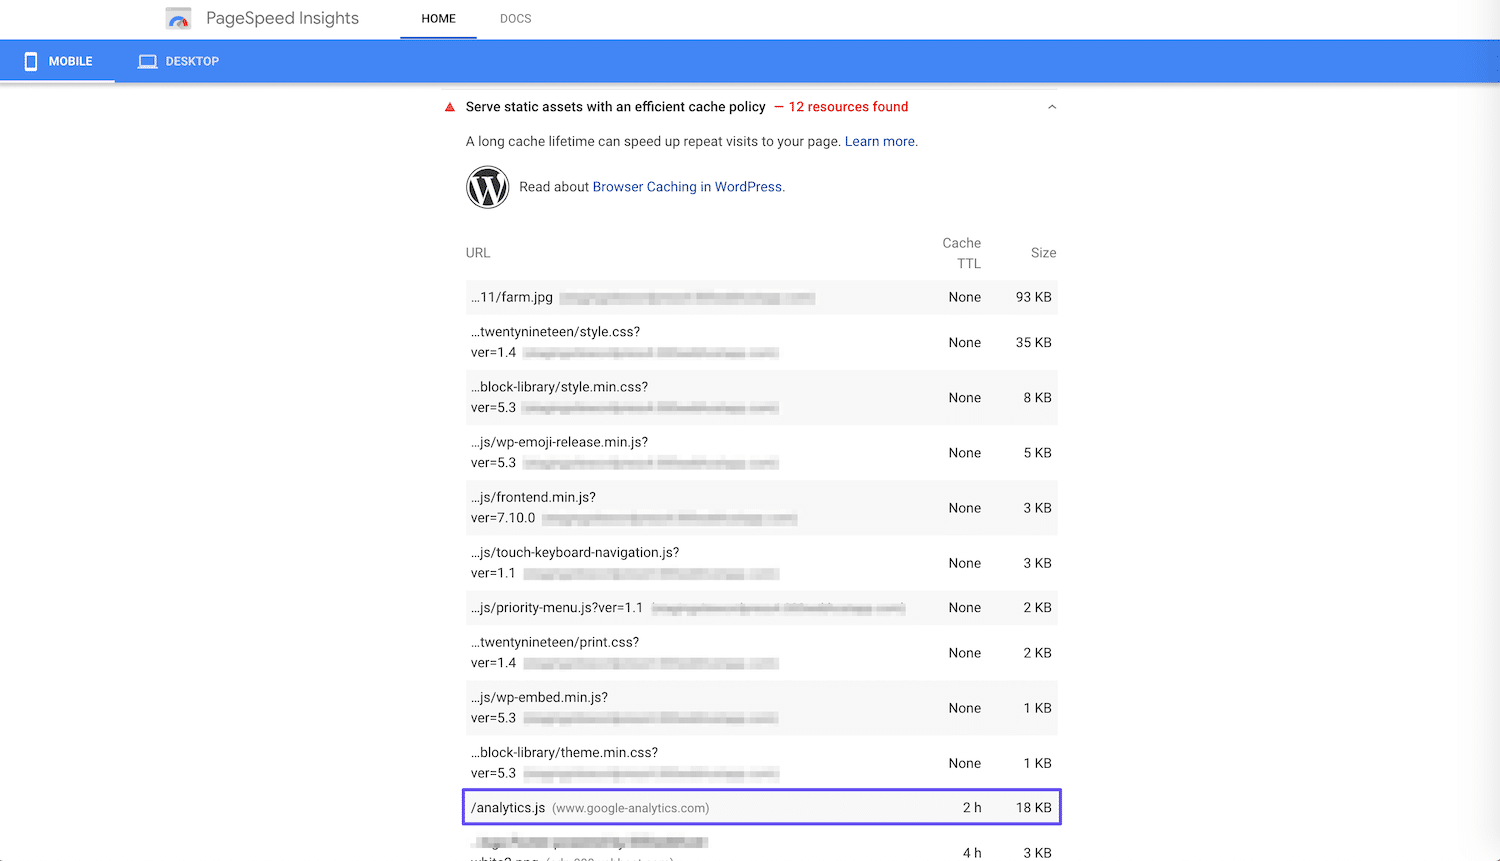
The problem is that by default, Google Analytics has a two-hour cache time, as you can see in the warning above. This is likely because if Google needs to modify something on its end, it wants all users to have access to the changes as fast as possible.
By hosting the Google Analytics script on your own server, you can change the cache time to improve performance.
Syncing Google Analytics Locally with the Complete Analytics Optimization Suite
To get started, we recommend using the Complete Analytics Optimization Suite (CAOS), a free plugin created and developed by Daan van den Bergh. It currently has over 20,000 active installs with a five-star rating:

You can download it from the WordPress repository, or by searching for it under Plugins > Add New in your WordPress dashboard.
The CAOS allows you to host your Google Analytics JavaScript file (analytics.js) locally and keep it updated using wp_cron(). Other features enable you to:
- Anonymize the IP address of your visitors.
- Set an adjusted bounce rate.
- Change the placement of the Google Analytics script (header or footer).
You’ll need to deactivate any analytics plugin you already have installed before using it.
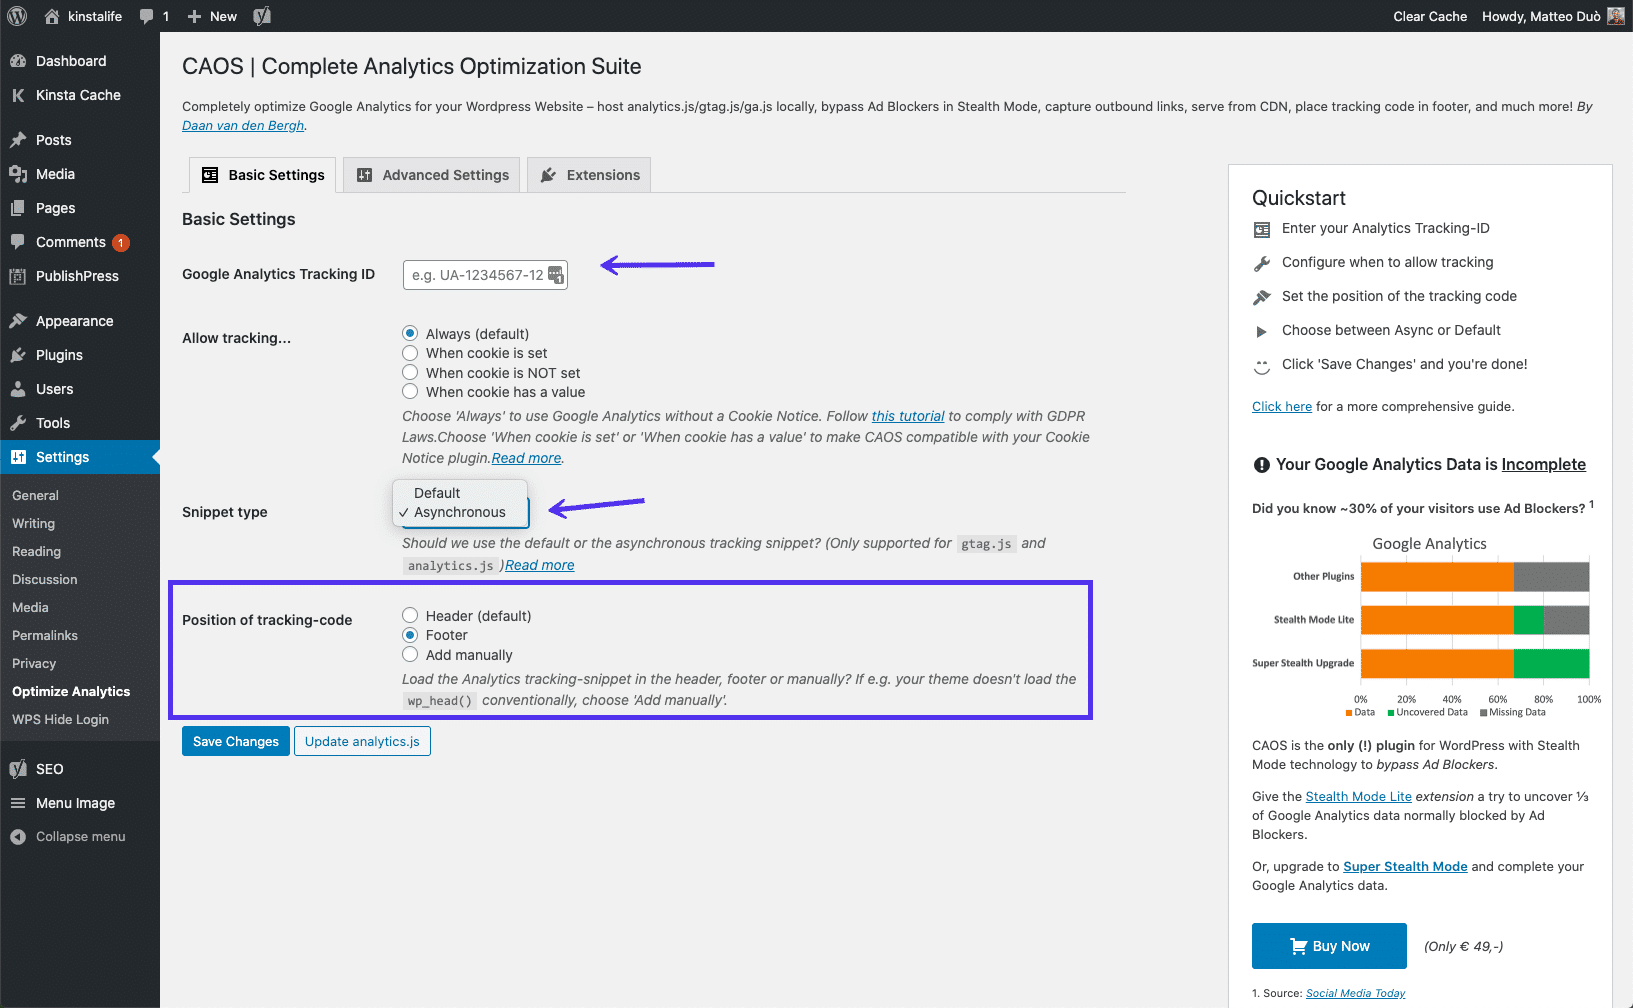
When you install CAOS and enter your Google Analytics Tracking ID, the plugin adds the necessary code for Google Analytics to your WordPress website. It then downloads and saves the analytics.js file to your server, and keeps it updated using a scheduled script in wp_cron().
We recommend setting the script to load in the footer by going to Settings > Optimize Analytics and selecting the Footer option under Position of tracking code:
It’s important to note that CAOS doesn’t work with other Google Analytics plugins.
Syncing Google Analytics Locally With Perfmatters
Another plugin you can use for local analytics is Perfmatters. This is a premium website performance optimization plugin created by Brian Jackson and his brother Brett:
Among its many features, there’s also an option to sync Google Analytics locally by entering your tracking ID. Like CAOS, you can also set the script to load in your footer instead of your header.