How to Increase WordPress Memory Limit

A vast variety of themes, plugins, file types, and add-on applications are supported by WordPress, making it an adaptable platform. However, you could occasionally run into the WordPress memory limit issue when trying to upload these resources.
Thankfully, there are solutions available to fix this issue. You may continue to add content and expand your WordPress website without encountering any problems if you increase the PHP RAM that is available.
How to increase WordPress memory limit
We’ll go through four possible ways to raise the WordPress memory limit below.
Unfortunately, because it largely depends on how your hosting environment is set up, we are unable to guarantee that any of these methods will work for you. We provided four distinct approaches since at least one of them ought to be applicable to your circumstances.
Before moving on, we strongly advise that you create a backup of your website because some of these repairs require modifying essential WordPress files.
Although there are several backup options, you may transfer your work to multiple cloud storage sites using the UpdraftPlus plugin.
Here are a few methods to raise the WordPress memory limit if you have a recent backup of your website.
1. Edit wp-config.php and increase wp_memory_limit
Increasing the amount of memory you have available is an easy way to make up for memory shortages. WordPress’s wp_memory_limit variable allows you to set the current memory limit in the wp-config.php file. This cap, nevertheless, can be lower than the RAM that comes with your hosting package.
Should that be the case, modifying your wp-config.php file can help you fix this problem. There is some danger involved in making changes at the code level, so it’s a good idea to back up your website before continuing.
To edit the wp-config.php file, you’ll need to connect to your server via File Transfer Protocol (FTP) using an FTP client such as FileZilla.
Inside the FileZilla application, navigate to File > Site Manager. If this is your first time connecting over FTP, then select File > Site Manager > New Site:
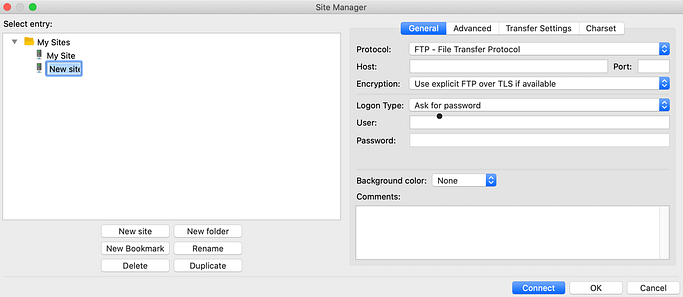
You can now enter some information about your site, along with your FTP username and password. If you don’t know your FTP credentials, you can typically find this information in your web hosting account.
FileZilla will now connect to your site and display all of its files. In the app, navigate to your site’s root folder:
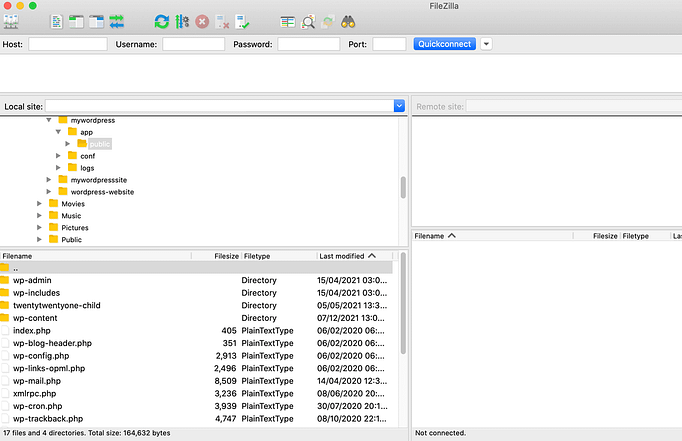
Inside this folder, right-click on the wp-config.php file, and select View/Edit. This opens wp-config.php in your default text editor. Now, search for the following phrase – WP_MEMORY_LIMIT.
It might look something like this:
define( 'WP_MEMORY_LIMIT', '32M' );If this code already exists in your wp-config.php file, you need to increase the number. For example, you can increase it from 32M to 256M.
If you don’t see this line of code in the file, you’ll need to add it. Just add the following code above the line that says /* That's all, stop editing! Happy publishing. */:
define( 'WP_MEMORY_LIMIT', '256M' );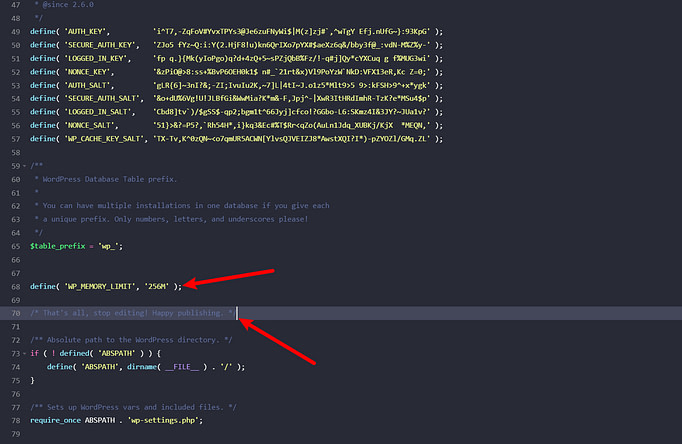
2. Change your server settings via PHP.ini
You may also be able to lift the memory limit by editing your PHP.ini file. This file sets the default configuration for any application that requires PHP.
Every time someone visits your WordPress site, PHP runs on your server. During this process, the PHP programming language looks to the PHP.ini file for instructions. This includes setting your current WordPress memory limit.
If your host uses cPanel, you may be able to edit the PHP.ini configuration via cPanel. Typically, this tool is called something like MultiPHP Manager, MultiPHP INI Editor, or PHP Config. Not all hosts give you this ability, though.
If your host doesn’t offer an in-dashboard PHP.ini editor, you also might be able to edit the PHP.ini file via FTP.
Once you’re connected, navigate to the root directory in the FileZilla window and locate the file.
Open the file and look for a line that includes memory limit=. You can now increase this value and save your changes.
Before these changes can come into effect, you’ll need to restart your server. Once your server is back up and running, you should no longer encounter the WordPress memory limit error.
3. Edit your .htaccess file
The .htaccess file is an important configuration file if your web host uses Apache (which many hosts do). This file controls a lot of your site’s configuration, including its memory limit.
You can use .htaccess to relay instructions to your server, without having to edit your server configuration files. This makes .htaccess a good alternative if you can’t access your PHP.ini file.
To access this file, connect to your server using an FTP client, as we discussed in the previous sections. You can then navigate to your site’s public_html directory, which contains the .htaccess file:
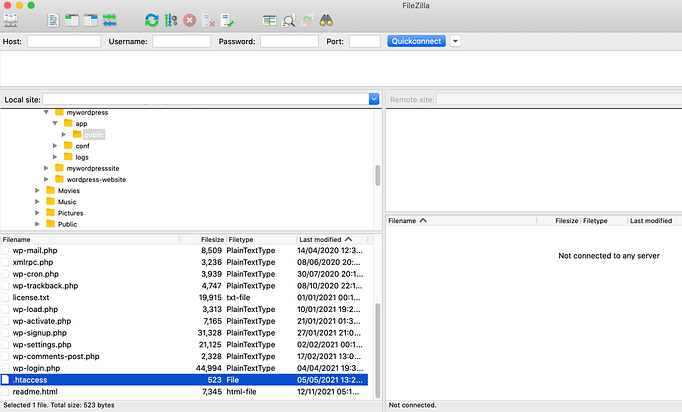
Now, open this file and add the following code snippet below the # END WordPress line:
php_value memory_limit 256MHere’s what it might look like:
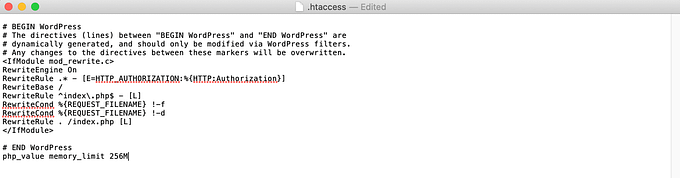
Make sure to save your changes when you’re done.
4. Upgrade your website’s hosting plan
While you can often increase the memory that’s available to your site, you’re ultimately restricted by your hosting plan. Each plan will grant you access to a finite amount of resources. If you’ve tried all of the above fixes and you’re still encountering this error, then you may have outgrown your current plan.
If you want to check your memory allocation, you should be able to find this information on your web host’s website, or in your hosting panel. Alternatively, you can always contact your provider for assistance.
If you suspect that you’ve reached the limit of your allocated resources, you may want to consider upgrading your plan. This may involve moving to a higher tier, or switching to a different type of plan. For example, if you’re currently on a shared hosting plan, then it may be time to upgrade to a virtual private server (VPS). You might even splash out on a dedicated server.
Alternatively, you may decide to change your hosting provider. When searching for a new host, we recommend paying careful attention to the amount of memory allocated as part of each plan. Wherever possible, try to find a provider that offers a default memory limit of 256 MB or higher.
It’s also smart to opt for a flexible provider. If you can easily increase the amount of resources allocated to your site, you’re far less likely to encounter the memory limit error in the future.