How to Configure SSL on IIS?

To encrypt traffic between the web server and the client browser, as well as to protect privileged passwords while they are in transit, you must configure SSL. Privileged Identity does not come with a pre-installed certificate. Rather, you must obtain a certificate from a public certificate authority, from an internal private certificate authority, or by using a free utility. You can also use a self-signed certificate or create one in IIS.
Create an SSL Certificate

- On the web app host server, open Internet Information Services (IIS) Manager.
- From the Connections pane, select your server node.
- From the center pane, open Server Certificates.
- To create a request to an external certificate authority, go to External Certificate Authority.
- To create a request to an internal certificate authority, go to In-House Certificate Authority.
- To create a self-signed certificate, go to Self-Signed Certificate.
External Certificate Authority
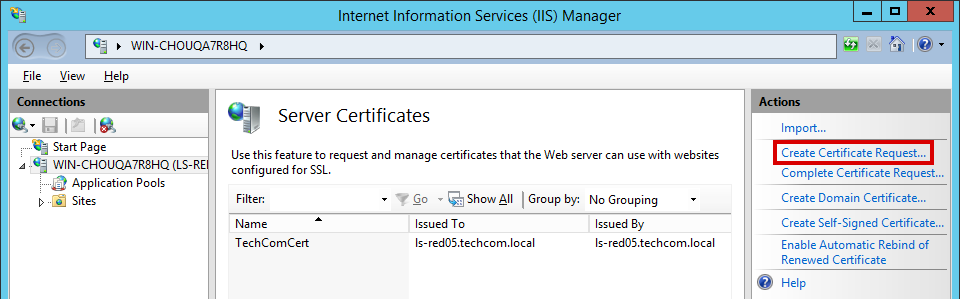
- To create a certificate request to a third-party certificate authority, select Create Certificate Request from the Actions pane.

- On the Distinguished Name Properties dialog, enter the Common name (the name of the server as entered in a browser). Fill in all fields, and then click Next.
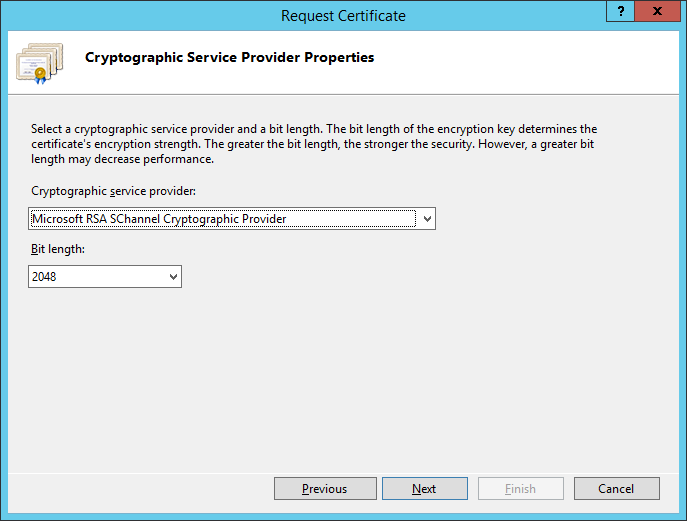
- Select the appropriate Crytographic service provider.
- Set the Bit length to 2048 bits or higher to maintain compatibility with modern browser and systems.
- Click Next.
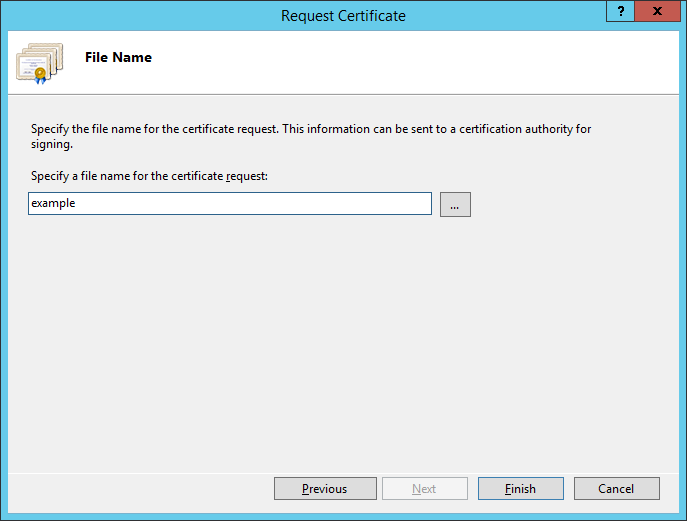
- Enter a name for the certificate request file, and then click Finish.

- You must now send the certificate request file to the certificate authority. Once they have signed your certificate and returned it to you, select Complete Certificate Request from the Actions pane.
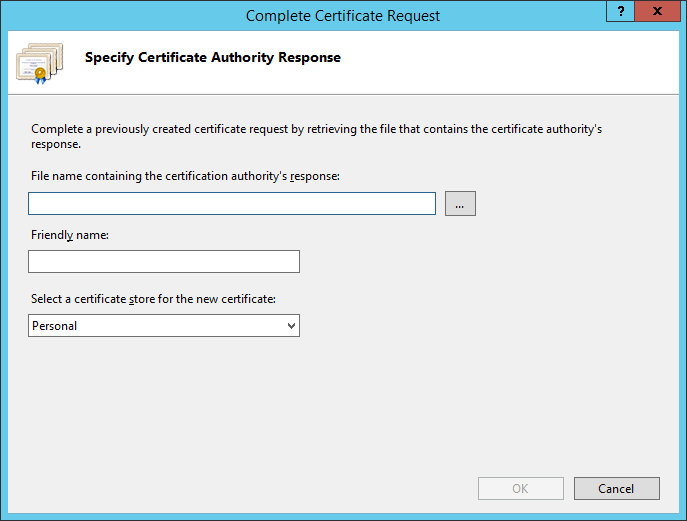
- Browse to the signed certificate file.
- In Friendly Name, enter a name for easy identification.
- Select Web Hosting as the certificate store, and then click OK.
- The certificate is added to the Server Certificates list.
In-House Certificate Authority
- To create a certificate request to an in-house certificate authority, select Create Domain Certificate from the Actions pane.

- On the Distinguished Name Properties dialog, enter the Common name (the name of the server as entered in a browser). Fill in all fields, and then click Next.
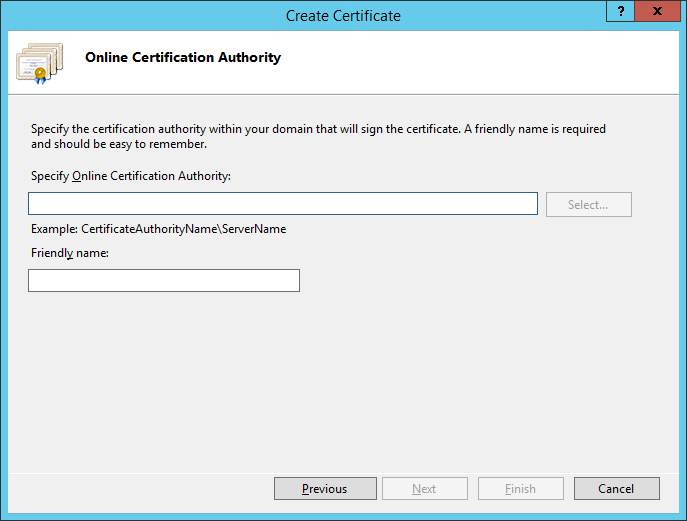
- In Specify Online Certification Authority, enter or search for the path of a certificate authority in your Windows domain.
- In Friendly name, enter a name for easy identification.
- Click Finish.
- The certificate is added to the Server Certificates list.
Self-Signed Certificate
- To create a self-signed certificate, select Create Self-Signed Certificate from the Actions pane.

- Enter a name for easy identification, and then click OK.
- The certificate is added to the Server Certificates list.
Configure the Web App to Use Your Certificate
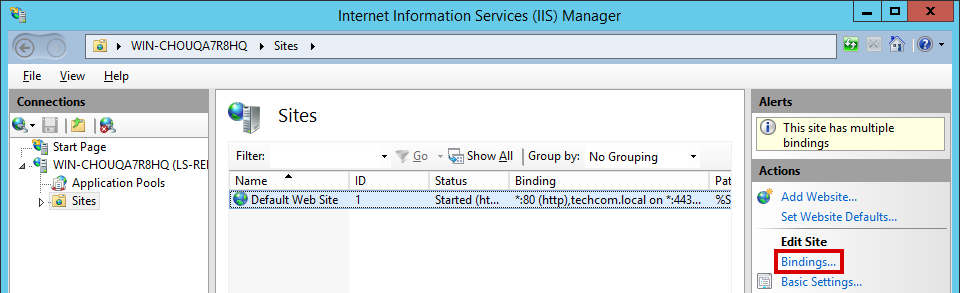
- On the web app host server, open Internet Information Services (IIS) Manager.
- From the Connections pane, expand your server node, and then click Sites.
- From the center pane, select the web site that hosts your Privileged Identity web app.
- From the Actions pane, select Bindings.
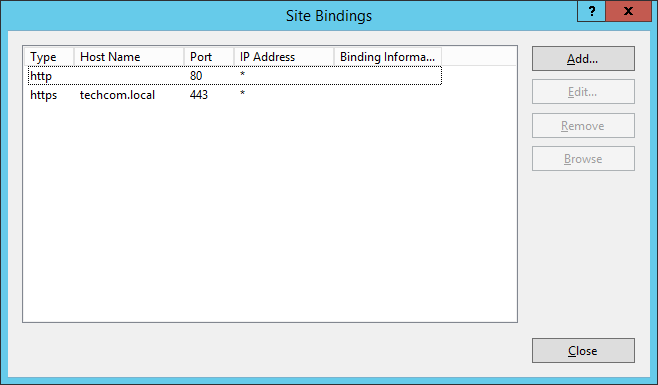
- From the Site Bindings dialog, click Add.
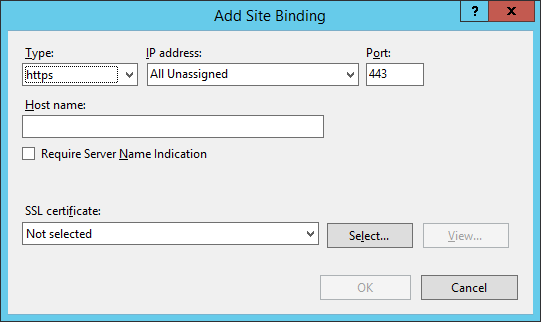
- From the Type dropdown, select https.
- From the IP address dropdown, select an IP or select All Unassigned.
- You may leave Port as the default unless your network settings require you to change it.
- Enter the Host name for your site.
- If you need to include a virtual domain as part of SSL negotiation, you may check Require Server Name Identification.
- Select the appropriate certificate from the SSL certificate dropdown.
- Click OK.
- HTTPS binding is now appended to the web site. Click Close.

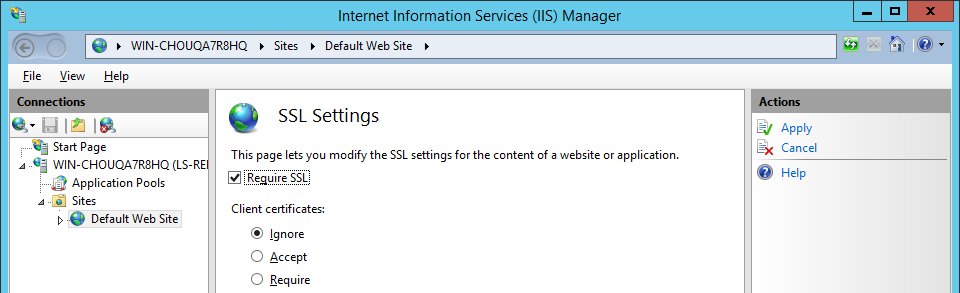
- To require the web site to use SSL, select your site node from the Connections pane of the IIS manager.
- In the IIS section of the center pane, open SSL Settings.